

Properly storing potting soil is crucial for maintaining its quality and ensuring successful gardening endeavours. Whether you’re an avid gardener or just starting out, knowing the best tips and tricks for storing potting soil can make a significant difference in the health and vitality of your plants. From choosing the proper containers to understanding how to maintain soil quality over time, several key factors must be considered. This guide will explore essential techniques and strategies to help you store potting soil effectively.
By following these tips, you’ll be able to preserve your soil’s nutrients and moisture content, ensuring that it remains fertile and ready for use whenever you need it. Get ready to elevate your gardening game with these expert insights on potting soil storage!
About potting soil and storage

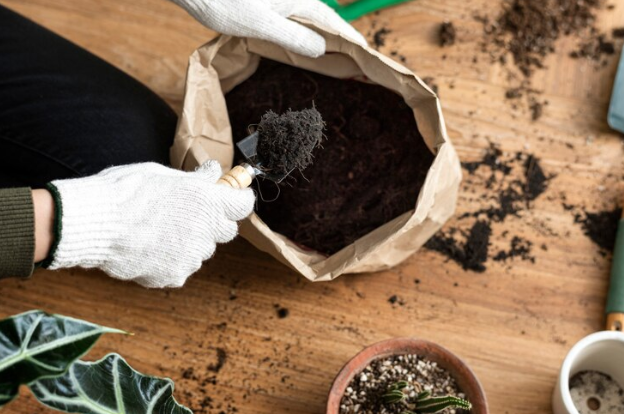
Potting soil, also known as potting mix or growing medium, is a specially formulated blend of organic and inorganic materials designed to provide plants with nutrients, aeration, and drainage for healthy growth. It typically consists of peat moss, perlite, vermiculite, compost, and sometimes sand or bark. Potting soil is widely used in container gardening, indoor plants, seed starting, and transplanting.
Read To know more: What is the best potting soil for indoor plants?
Proper storage of potting soil is essential to maintain its quality and effectiveness. Storing potting soil in a dry, well-ventilated area away from direct sunlight helps prevent moisture buildup, which can lead to mould growth and degradation of the soil’s structure. Additionally, storing potting soil in sealed containers or bags helps protect it from contamination by pests, fungi, and other harmful organisms. By following correct storage practices, gardeners can ensure that their potting soil remains fertile and suitable for use whenever needed, contributing to successful plant growth and thriving gardens.
How long can potting soil be stored?
The shelf life of potting soil can vary depending on various factors, such as storage conditions, the quality of the soil, and whether it’s been opened. Generally, adequately stored potting soil can remain viable for six months to a year. However, monitoring the soil periodically for signs of degradation or contamination is essential.
Factors that can affect the longevity of potting soil include moisture levels, exposure to sunlight, temperature fluctuations, and the presence of pests or pathogens. Storing potting soil in a cool, dry place away from direct sunlight and moisture can help prolong its shelf life.
Inspecting the soil before use is crucial, especially if it has been stored for an extended period. Look for any signs of mould, mildew, unusual odours, or pest infestations, which indicate that the soil may no longer be suitable for use. If the soil appears to be degraded or contaminated, it’s best to discard it and use fresh potting soil for your gardening projects.
Why is storing potting soil correctly is essential?

Storing and potting soil correctly is crucial to maintaining its quality and effectiveness in nurturing plants. Proper storage prevents moisture accumulation, a common culprit behind mould growth and bacterial proliferation within the soil. Excessive moisture compromises the soil’s structure and diminishes its ability to retain essential nutrients and water, impacting plant health adversely. Additionally, storing potting soil in appropriate containers shields it from external contaminants like pests and chemicals, safeguarding its composition and fertility. Ensuring the soil remains free from harmful influences creates an optimal environment for plant roots to thrive and develop robustly.
Correct potting soil storage extends its shelf life, allowing for prolonged use without compromising quality. This longevity ensures consistent access to nutrient-rich soil for your plants, promoting their overall health and vitality. Therefore, understanding and implementing proper storage practices are essential for any gardener seeking to maintain a flourishing garden ecosystem and nurture thriving plant life.
Choosing the Right Container
Choosing a suitable container for storing potting soil is essential to ensure the soil remains in optimal condition for gardening projects. Consider the following points when selecting a container:
- Material: Opt for containers made of durable and waterproof materials such as plastic or metal. These materials help prevent moisture from seeping into the soil and protect it from external contaminants.
- Size: Choose a container size that matches the quantity of potting soil you intend to store. Avoid oversized containers, which may lead to unnecessary soil compaction and hinder proper airflow.
- Ventilation: Select containers with adequate ventilation to allow for airflow. Proper ventilation helps prevent moisture buildup and maintains the soil’s texture and nutrient content.
- Lid or Cover: Look for containers with tight-fitting lids or covers to seal the soil and protect it from exposure to sunlight, pests, and debris. Airtight seals help maintain soil moisture levels and prevent mould or mildew growth.
- Accessibility: Consider how easy it is to access the stored soil when needed. Containers with wide openings or removable lids facilitate scooping or pouring out the soil without causing spills or mess.
- Portability: If you plan to move or transport the container, choose one with handles or wheels for easy manoeuvrability.
Read Also: Best indoor plant potting soil for indoor plants: (Review 2024)
Preparation Steps
Before storing potting soil, it’s essential to take specific preparation steps to ensure the soil remains in optimal condition:
- Cleaning Containers: Clean and sterilise the containers or storage bins holding the potting soil. Use hot, soapy water to wash the containers, then rinse them thoroughly to remove any soap residue. Sterilize the containers by soaking them in a diluted bleach solution, then allow them to air dry completely before adding the soil.
- Inspect for Contaminants: Before filling the containers with potting soil, inspect them for any signs of mould, mildew, or pests. Remove any debris or foreign objects that may have accumulated in the containers to prevent them from contaminating the soil.
- Choose a Suitable Location: An excellent, dry location for storing the potting soil. Avoid areas prone to temperature fluctuations or high humidity, as these can affect the soil quality. Ideally, store the soil in a garage, shed, or basement, protected from direct sunlight and moisture.
- Provide Adequate Ventilation: Ensure the storage area is well-ventilated to prevent moisture buildup and allow for proper airflow around the containers. Proper ventilation helps prevent mould growth and maintains the freshness of the soil.
- Label Containers: Label the containers with the date of storage and the type of potting soil inside. This will help you track how long the soil has been stored and ensure that you use it before it expires.
Storage Techniques
When it comes to storing potting soil, there are several techniques you can employ to maintain its quality and usability:
- Bag Storage: If you purchase potting soil in bags, ensure they are tightly sealed to prevent moisture from seeping in. Store the bags in a dry, well-ventilated area away from direct sunlight. Avoid stacking heavy objects on the bags, which can compact the soil and impede airflow.
- Bulk Storage: For larger quantities of potting soil, consider storing it in bulk containers such as bins or buckets. Ensure the containers are clean and dry and have tight-fitting lids to seal out moisture and pests. Store the containers in an excellent, dry location, such as a garage or shed, and cover them with a tarp to protect them from the elements.
- Proper Ventilation: Regardless of the storage method used, it’s essential to maintain appropriate ventilation around the potting soil. Adequate airflow helps prevent moisture buildup and allows the soil to remain fresh and usable for extended periods.
- Avoiding Contaminants: Keep stored potting soil away from sources of contamination such as chemicals, fertilizers, fertilizizers, and pesticides. Store it in a separate area from these materials to prevent cross-contamination, which can affect soil quality.
- Regular Inspection: Inspect stored potting soil for moisture, mould, or pest infestation signs. If any issues are detected, take appropriate measures to address them promptly to prevent further damage to the soil.
Maintaining Quality
Maintaining the quality of stored potting soil is essential to ensure its effectiveness in supporting healthy plant growth. Here are some critical practices to help you preserve the quality of your potting soil:
- Monitor Moisture Levels: Regularly check the moisture content of the soil to prevent it from becoming too dry or too wet. Optimal moisture levels promote microbial activity and nutrient availability while minimizing mould or mildew growth risk.
- Control Temperature: Store potting soil where minimal temperature fluctuations occur. Exposure to extreme heat or cold can alter the soil’s composition and reduce its effectiveness. Aim to keep the storage area at a moderate, consistent temperature.
- Prevent Compaction: Avoid stacking heavy objects on top of stored potting soil, which can compact the soil and restrict airflow. Compaction hinders root growth and nutrient uptake, leading to poor plant performance.
- Inspect for Contaminants: Regularly inspect stored potting soil for signs of pests, weeds, or disease pathogens. Promptly remove any contaminants to prevent them from spreading and compromising the soil’s quality.
- Rotate Stock: Use a “first in, first out” approach when accessing stored potting soil to ensure that older batches are used before fresher ones. This practice helps prevent soil degradation over time and ensures that plants receive the most nutrient-rich soil possible.
- Rejuvenation: If stored potting soil shows signs of deterioration, consider rejuvenating it by adding organic amendments such as compost, aged manure, or worm castings. Mixing in fresh materials helps replenish nutrients and improve soil structure.
What should I do if my stored potting soil smells Bad?
If your stored potting soil develops a foul odour, it may indicate the presence of mould, mildew, or other harmful microorganisms. To address this issue:
- Inspect the Soil: Carefully examine the potting soil to identify any signs of mould, mildew, or pest infestation. Look for discolouration, unusual growths, or the presence of insects or larvae.
- Dispose of Contaminated Soil: If the soil is severely contaminated or emits a strong odour, it’s best to discard it. Use gloves and a mask to handle the soil safely and prevent exposure to harmful pathogens.
- Ventilate the Area: Open windows or doors to allow fresh air to circulate in the storage area. Proper ventilation can help dissipate odours and reduce moisture levels, preventing further microbial growth.
- Clean and Sterilize Containers: Clean and sterilise the storage containers thoroughly if the odour persists after removing the contaminated soil. Wash the containers with hot, soapy water, then disinfect them with a diluted bleach solution.
- Replace with Fresh Soil: Replace the discarded potting soil with fresh, high-quality soil for future use. Ensure the new soil is stored in clean, dry containers to prevent contamination.
- Monitor Humidity Levels: Keep an eye on humidity levels in the storage area and take steps to reduce moisture if necessary. Dehumidifiers or moisture-absorbing products can help maintain optimal conditions for storing potting soil.
Alternative Storage Methods

In addition to traditional storage methods, there are alternative approaches you can consider for storing potting soil:
- Airtight Containers: Utilising airtight containers, such as plastic bins with sealing lids, can help maintain potting soil’s freshness and moisture content. These containers provide an extra layer of protection against moisture, pests, and contaminants, ensuring the soil remains viable for extended periods.
- Storage Bags with Zip Locks: Zip-lock storage bags offer a convenient and space-saving option for storing smaller quantities of potting soil. These bags can be sealed tightly to prevent moisture from entering and are ideal for storing soil in limited spaces, such as closets or cabinets.
- Vacuum Sealing: Vacuum sealing is another method to preserve the quality of potting soil by removing air and creating an airtight seal. Vacuum-sealed bags or containers help prevent moisture buildup and maintain the soil’s texture and nutrient content over time.
- Storage Bins with Wheels: Consider using storage bins equipped with wheels for easy mobility and access to potting soil. These bins allow you to move the soil effortlessly between indoor and outdoor gardening areas while protecting it from the elements.
- Moisture-Control Products: Incorporating moisture-control products like silica gel packets or moisture-absorbing crystals into storage containers can help regulate humidity levels and prevent moisture-related issues like mould or mildew growth.
- Compact Shelving Systems: Install compact shelving systems in your storage area to maximize space utilization and efficiently containers of potting soil. This allows for easy access to different batches of soil while keeping them neatly arranged and protected.
Can I reuse old potting soil?
Yes, you can reuse old potting soil with proper rejuvenation techniques. Over time, potting soil may become depleted of nutrients and compacted, making it less effective for plant growth. However, revitalizing the soil with organic amendments and proper preparation can restore its fertility and structure.
To reuse old potting soil:
- Begin by inspecting it for signs of deterioration, such as compaction, mould, or pest infestation.
- Remove debris or dead plant material from the soil, and then aerate it by loosening it with a garden fork or shovel.
- Incorporate organic matter such as compost, aged manure, or worm castings to replenish nutrients and improve soil structure.
- Mix the amendments thoroughly into the soil and moisten it evenly before using it for planting.
FAQ
How can I prevent pests from infesting stored potting soil?
To prevent pests, store potting soil in sealed containers and avoid placing it directly on the ground where pests can easily access it.
Is it necessary to sterilise containers before storing potting soil?
Yes, cleaning and sterilizing are essential to remove any pathogens or contaminants affecting the soil’s quality during storage.
Can I store potting soil in the original packaging?
Yes, you can store potting soil in its original packaging, but ensure it’s tightly sealed to prevent moisture from entering and compromising the soil.
What’s the best way to store potting soil in a small space?
Consider using compact storage bins or bags stacked vertically to maximize space utilization while protecting the soil.
Can I store potting soil outdoors?
It’s best to store potting soil indoors or in a sheltered area to protect it from exposure to moisture, sunlight, and temperature fluctuations that can degrade its quality.
How often should I inspect stored potting soil for signs of degradation?
It’s recommended to inspect stored potting soil periodically, at least every few weeks, to check for moisture levels, mould growth, or pest infestations that may require attention.
Conclusion
In conclusion, proper potting soil storage is essential for maintaining its quality and effectiveness in gardening projects. By following the outlined techniques and precautions, gardeners can ensure that their potting soil remains fertile and ready for use whenever needed, contributing to successful plant growth and thriving gardens.


